Transitions
Crossfading clips
To do a crossfade between two clips on the same layer, simply drag one of the clips onto the other so that it overlaps. The overlapping region will be used as a space for transition between the two clips. You can adjust the length of the transition either by moving the clips or by trimming them. If you want to apply other types of transitions than the default (crossfade), see the Other types of transitions section on this page.
Crossfades are achieved using Pitivi's video mixing features, which use keyframes to control the opacity of clips. This means that if you set opacity keyframes for a clip, they will be taken into account for the crossfade.
Other types of transitions
Assuming that you have two overlapping clips in your timeline, you can achieve other types of transitions by following these steps:
Select the overlapping region by clicking on it.
Select the Transition tab in the middle pane.
Select one of the offered transitions.
The transitions can be further adjusted with the following options from the bottom of the Transition tab:
Normal mode will apply the transition in a linear fashion over the whole overlapping region. When in normal mode, you can adjust the degree of sharpness/smoothness of the transition.
Loop mode will apply the transition in a circular manner. When in loop mode, you can adjust the speed with which the transition will repeat itself.
In both modes, you can apply the transition in reverse direction by ticking the corresponding checkbox.
Each transition has its name and description. They are displayed when you hover the cursor over the transition icon. You can also filter the transitions by typing into the search entry at the top of the Transition tab. This will show only transitions whose name or description match your search terms.
Fade-ins and fade-outs
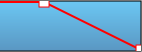
You can create fade-in and fade-out transitions in single clips by specifying their duration in the Compositing section of the Clip Properties panel. These can be fine-tuned by interacting with the Keyframe curve controlling the clip's opacity. To understand opacity, see Understanding layers. The following images illustrate how to fade a clip to black by editing the clip's keyframes:


To achieve a fade-in, simply create a mirroring keyframe curve (new keyframe in a position where the fade-in should end and the first keyframe dragged down) at the beginning of the clip.
Fades and crossfading as described here can be applied to both audio and video clips.