Pitivi 0.96 — Cogito Ergo Proxy
Besides the usual cleanup and bug squashing, this release brings a fundamental feature which greatly improves the edit experience. Now you can edit and render a video project with any video files with great accuracy, thanks to proxy files.
Proxy editing: fast and accurate editing with any video format
The harsh reality of this world is that there is only a limited set of formats that really work well for video editing. Without those, rendering a project could have been inaccurate at times*. The user experience degrades when using container formats not designed for fast & accurate seeking. For example, seeking a video format where the keyframes are followed by one or more inter-frames (such as in VP8, H.264) is often slow.
To provide the best experience, we decided to give you the ability to seamlessly work with media formats suitable for video editing. This is accomplished with what we call “proxy” files. Other video editors advertise the use of downscaled proxy files which, besides the improved reliability, also provide better performance when the system is not powerful enough to handle high-quality video files in real-time. We do not cover the the downscaled proxy files case yet—that’s planned for post 1.0. For now, our proxies are high-quality proxies intended to be used instead of the original, when editing and also when rendering the project.
Oh, and since we’re so smart, we now also generate the audio waveforms and filmstrip thumbnails at the same time as we are processing proxies. Super efficient.
So what is the difference between an original and its “proxy”? The proxy is a slightly degraded but easier-to-work-with version of the original:


Okay, okay, we might be stretching the analogy a little bit, but you get the picture.
When are proxies needed for stability?
The whitelist below shows the formats we officially support—which can be used safely without proxying them. For the rest, we recommend using proxy files to guard against bugs in the decoders and demuxers. Depending on how popular other formats get, we will consider officially supporting them. The intention is to keep the list short to avoid spending too much time on decoders and demuxers.
At the moment, the whitelist is comprised of the following:
- Containers: QuickTime, Ogg, Matroska, WebM
- Video codecs: H.264, MJPEG, VP8, Theora, raw
- Audio codecs: Opus, MP3, Vorbis, FLAC, raw
How does it work?
When you import an asset with an unsupported format, it is by default transcoded using a codec suitable for video editing. You can disable or force the proxy creation on a per-asset basis, when you import or later at any time. Finally, when rendering, you can specify whether to use the proxies or the original files. You are always in control.
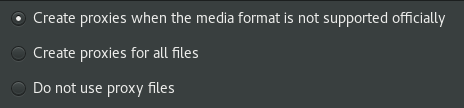
Options when importing files

Options for already imported video files
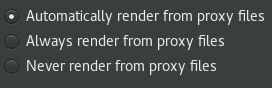
Options when rendering a project
As seen in the screenshots above, the state of an asset’s proxy is shown by an icon in the bottom-left corner of the asset thumbnail, in the Media Library. The icon can be one of:
- none The original is used.
 The proxy is being created by transcoding the asset.
 The proxy is ready and is used automatically.
 The proxy creation failed and the original is used.
The main disadvantage of using the intermediate proxy files for rendering is that some quality is lost when transcoding, but this is not noticeable in most cases. Other than that, transcoding the originals takes a bit of time and they take some disk space (around 10 times more for H.264 content, for example). In practice, we think that using proxy files is the best option. You decide what works for you but take into account what is considered safe and officially supported, and what is not.
It was very important to pick a codec that preserves the visual quality of the originals, so that final renders can be done out of the intermediate proxy files with no perceived quality loss. The other requirement was that seeking should be fast, meaning it had to be an intra-frames-only codec, where a frame is encoded and decoded independently of any other frame. Currently Pitivi uses MJPEG or ProRes for the proxy files, depending on which is available on the system.
For now, the audio is transcoded using Opus, even though it’s a lossy format, because the codec is very good. We’ll most probably switch to FLAC when it will be more supported in GStreamer because it loses no quality and has a pretty good compression ratio.
Scrubbing the timeline easily
Currently the user is able to select, move and edit clips by using the left mouse button. This is exactly how a user expects to interact with a GTK UI and it works very well. In addition to that, when clicking using the left mouse button, a seek is performed and the playhead is moved to that position. Some users were annoyed by this combined behavior so we added an option for disabling seek on left-click, but this was not enough.
Inspired by Blender’s different functionality assignation for left and right mouse buttons, we added the ability to seek by right-clicking. Now you can quickly and safely scrub on the timeline as well on the ruler using the right mouse button. Since Pitivi did not provide a context menu when right-clicking on the timeline, it was easy to make this possible. Try it out and let us know what you think. More details on the reasoning that led to this are visible in T3158.
Transformation box
The transformation box is back, thanks to Collabora and Lubosz Sarnecki! This is the third implementation of the transformation box, first one being hacky and second one being available only for users with GL video cards. Now it works great due to the almighty GtkSink, GStreamer’s latest GTK widget for displaying video.
The new transformation box fits great with Pitivi by making clips selectable from the viewer, so you can manage multiple overlapping clips quite easily. But the best part of this implementation may be its extensibility, an example being the module for the title clips.
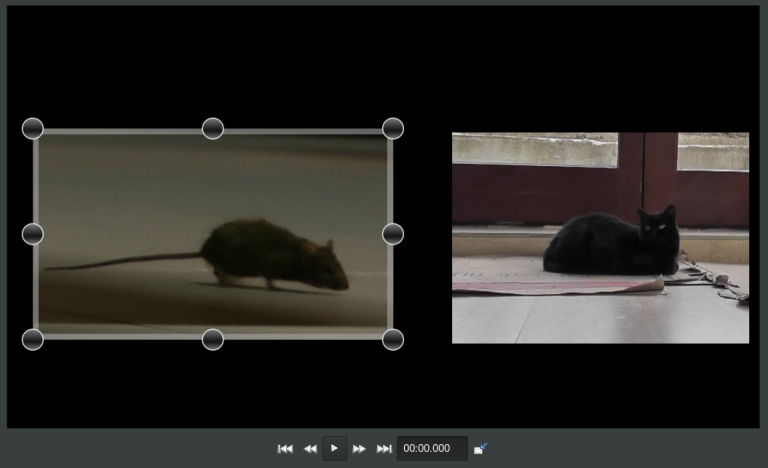
Transformation box around Alex's parents' cat's best friend
Project settings: letting the computer figure things out
At least one of our contributors felt intimidated when he first saw the project settings dialog which used to show up when creating a new project. The project settings define how you preview the project while editing. You might want for example to choose a small video size if your computer is not very powerful, then at render time change that to get the best quality. These settings can be changed safely at any time.
The question was whether showing that dialog is really necessary at that point in time. Well, not really. Now, when you create a new project, some default values are set and then when you import the first video file, its properties are transposed to the project settings.
The logic is thus: either users don’t really care about the project settings and the “Project Settings” dialog showing up when creating a new project overwhelms them, or the user is an experienced videographer, in which case they’ll know when they need to change the project settings and where to find them. A very nice touch is that when the project settings are changed automatically, an infobar appears, so the user has the chance of opening the project settings and correct them if need be. More details in T3161.
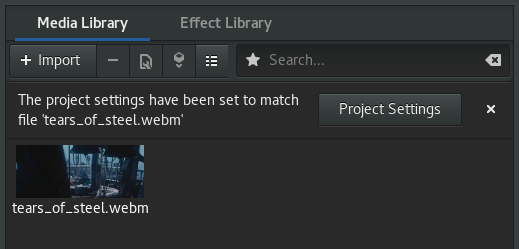
Infobar when the first clip is imported
New project settings and rendering UI
The widgets in the project settings dialog and the rendering dialog were split into multiple tabs, to fit on 1024x768 screens. Unfortunately this required clicking the tabs to see or edit the settings. Moving the eye is faster than clicking so we looked into this and came up with a solution to get rid of the tabs and keep the dialogs as small as possible.
The preset selection UI is now composed of a ComboBox plus a MenuButton. This way the preset selection UI takes extra vertical space instead of extra horizontal space. We find it works pretty good. More details about how it works and more screenshots in this doc.
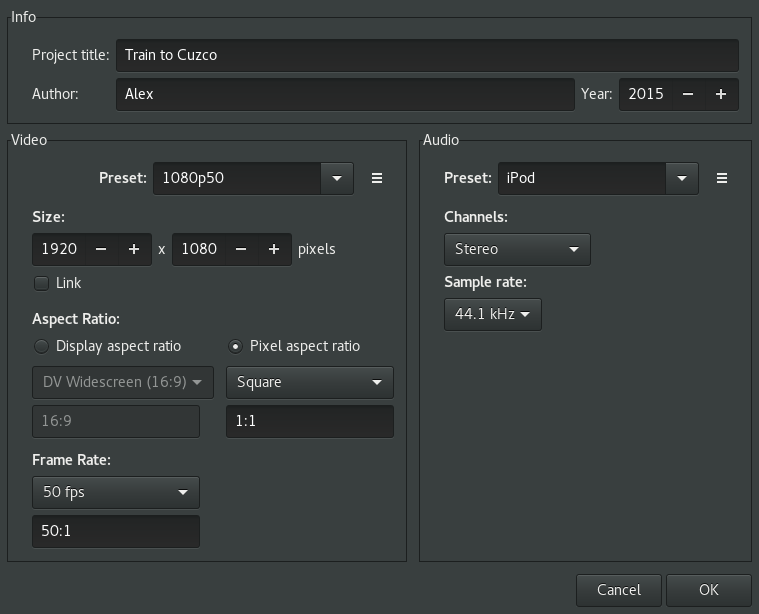
The Project Settings dialog
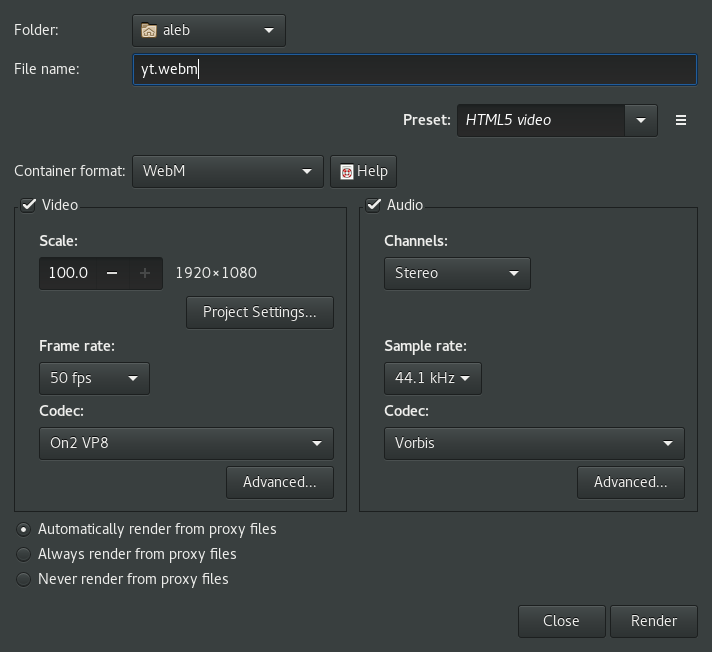
The Render dialog
Keyboard shortcuts window
Jakub Brindza joined us as a GSoC student. The first step of his project is already done, a brand new keyboard shortcuts window built dynamically, to be able to support custom shortcuts. Next will be allowing users to customize the keyboard shortcuts.
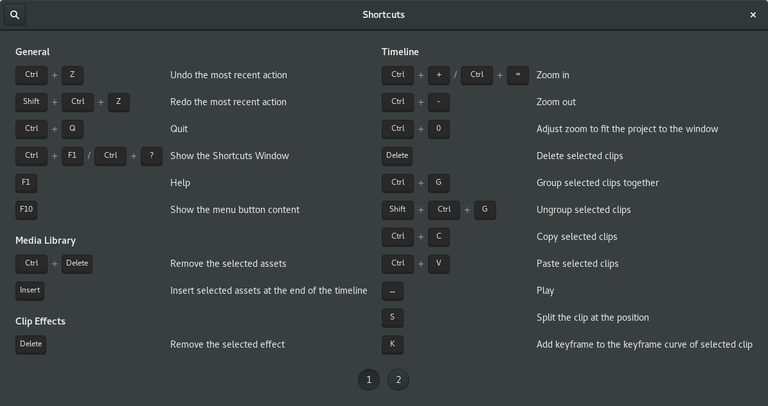
The Keyboard Shortcuts window
Other noteworthy changes
- The user manual has been updated to reflect the changes since we switched to the headerbar, about one year and a half ago.
- The undo/redo removal has been undone.
- We switched from AppImage to Flatpak to distribute our own builds. A big advantage is that due to Flatpak’s sandboxing we can use it for the development environment while previously we needed a separate complex script to take care of that.
* There was a very high chance of ending up with artifacts at the start of a clip with an inpoint.